Imagine a spoonful of silky-smooth pistachio paste—vibrantly green, bursting with natural nutty sweetness, and so versatile it can elevate everything from cakes and macarons to ice cream and toast. Now imagine that you made it yourself, from scratch, with just a handful of wholesome ingredients. Sounds dreamy, right?
In this ultimate guide to crafting homemade pistachio paste, we’ll walk you through every essential step—from picking the right pistachios to achieving that iconic creamy texture, all without any preservatives or additives. This isn’t just a recipe; it’s a journey into flavor, creativity, and control over what goes into your food.
We’ll cover everything you need to know, including:
Ingredient selection and prep
The perfect blending process
Flavor customization ideas
Expert storage tips
Common mistakes and how to fix them
Whether you’re a passionate baker or a curious beginner, this step-by-step breakdown will give you everything you need to create this luscious green spread at home—and trust us, once you’ve had it homemade, you’ll never go back to store-bought. Ready to dive in?
Part 1: Introduction & Foundations
What Is Pistachio Paste?
Pistachio paste is a thick, creamy spread made primarily from ground pistachios, often sweetened and blended with a touch of oil or water. It has a rich, nutty flavor and smooth consistency that’s somewhere between nut butter and marzipan. Don’t confuse it with pistachio butter though—they’re similar, but paste is usually sweeter, smoother, and made for confections like gelato, pastry fillings, and creams.
Its unique green hue and delicate flavor make it a prized ingredient in Middle Eastern, Italian, and French desserts. From pistachio macarons to gelato al pistacchio, this paste plays a starring role in some of the most beloved sweet treats.
Why Make It at Home?
Sure, store-bought pistachio paste exists—but most options are expensive and often come with preservatives, stabilizers, and artificial colors. Plus, many commercial versions include more sugar than pistachio!
When you make it at home, you’re in full control:
✅ Freshness: You’re using fresh, high-quality nuts.
✅ Customization: Adjust the sweetness, thickness, and flavor.
✅ Color: No green food dye—just the natural vibrance of pistachios.
It’s also more budget-friendly in the long run and extremely satisfying to whip up something gourmet in your own kitchen. And yes—it tastes way better than the jarred stuff.
Ready to roll up your sleeves? In Part 2, we’ll explore the ingredients, prep steps, and tools you’ll need to get started.
Part 2: Ingredients & Prep
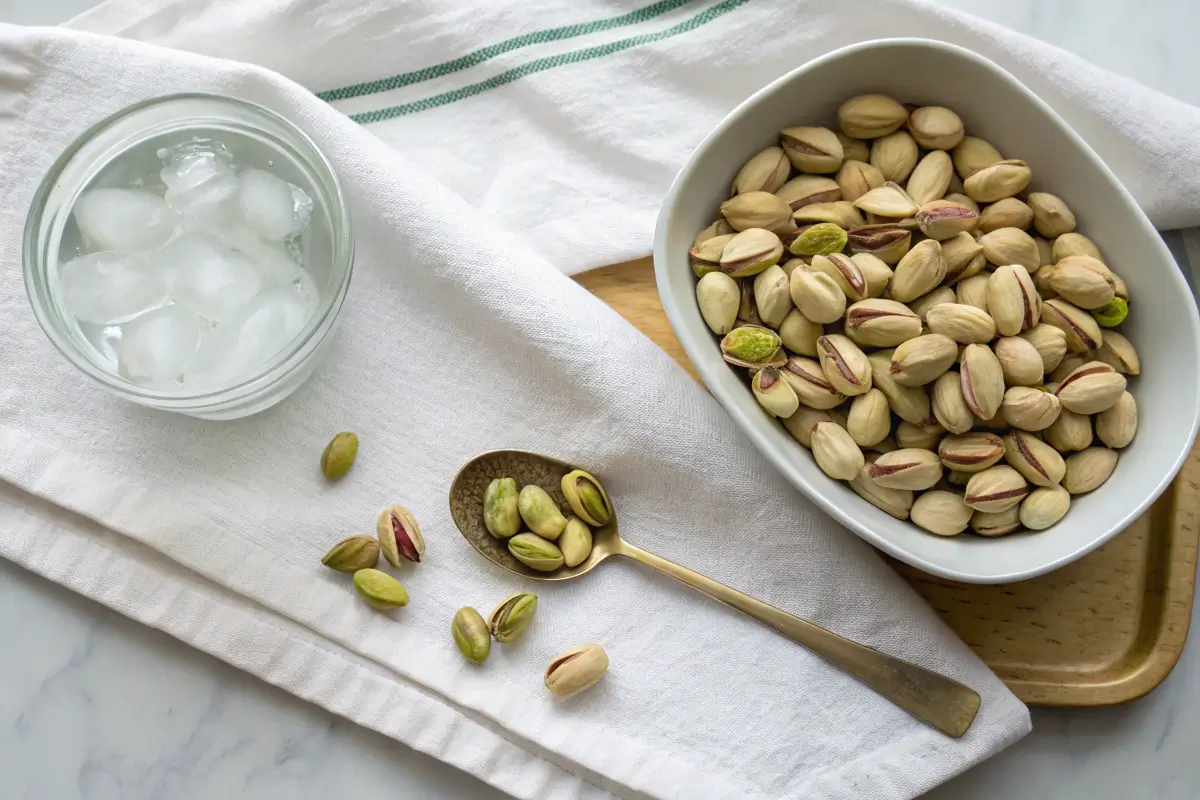
Choosing Your Pistachios
When crafting pistachio paste, your pistachio choice makes all the difference. Go for high-quality shelled pistachios—raw or dry-roasted. Raw ones offer a brighter green hue and fresh nutty flavor, while dry-roasted have a richer taste. Either way, ensure they’re unsalted and free from preservatives.
Pro Tip: If pistachios aren’t verdant, soak them quickly in hot water and rinse to revive color. Good visual appeal matters for ganache, buttercream, or macarons.
Ingredient List
Here’s what you’ll need:
400 g shelled pistachios (about 3½ cups)
1–2 tbsp neutral oil (grapeseed or light olive oil)
1–2 tbsp sweetener (honey, agave, or powdered sugar)
¼ tsp fine salt (optional)
½ tsp vanilla or almond extract (optional)
These simple items—pistachio paste ingredients—can easily be tweaked to taste.
Prep Work – Blanching & Skin Removal
To eliminate skins (they can impart bitterness and dull the color):
Blanch pistachios: scald in boiling water for 60 seconds.
Drain and rinse with cold water.
Gently pinch off skins—this keeps your paste smooth and vibrant.
Pat dry on a towel, then air-dry for 15 minutes.
This step enhances texture and preserves that beautiful pistachio-green.
Equipment & Prep Tips
You’ll need:
A high-speed food processor or powerful blender
Spatula for scraping sides
Airtight jar for storage
To avoid overheating nuts during blending, use a short burst technique: pulse for 10–15 seconds, rest, then repeat, scraping down sides. This ensures a creamy, even consistency without warming the paste too much.
Part 3: Step-by-Step Blending Process
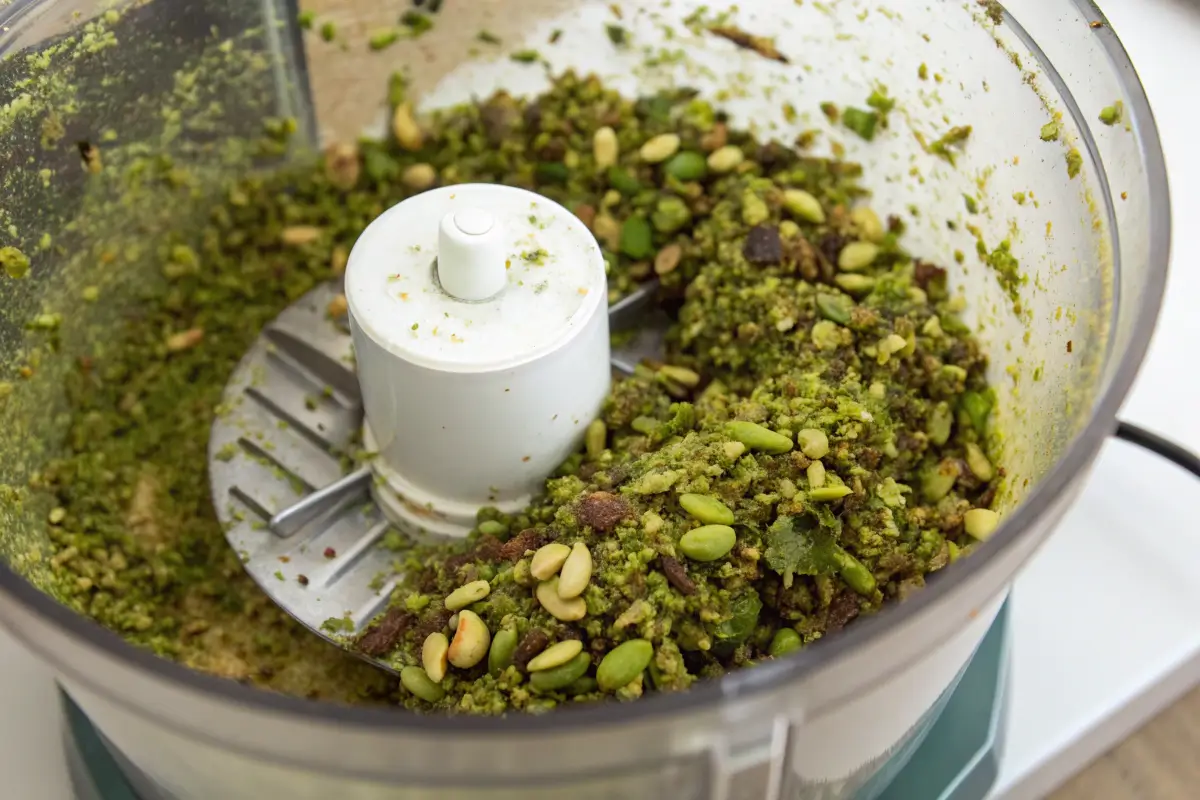
Stage 1: Grinding to Coarse Meal
Add dried pistachios to your processor.
Pulse until they form a coarse meal.
Pause, scrape down sides to collect all the bits.
Repeat until consistently crumbly.
Stage 2: Transforming Into a Paste
Once coarse, process continuously.
The nuts start releasing natural oils, becoming a thick paste.
After 1–2 minutes, drizzle in 1–2 tbsp of oil for smoothness.
Blend until silky—you want a smooth texture that spreads easily.
Stage 3: Sweetening & Flavoring
Taste and sweeten (1 tbsp honey or powdered sugar)—adjust to your liking.
Add ½ tsp vanilla or almond extract for depth.
Continue processing until fully incorporated.
Stage 4: Checking Texture & Color
The final paste should be thick yet spreadable.
Scrape into a bowl—if it’s thick, win! If too stiff, add a little oil/water.
Color should be bright and vivid—no gray tones.

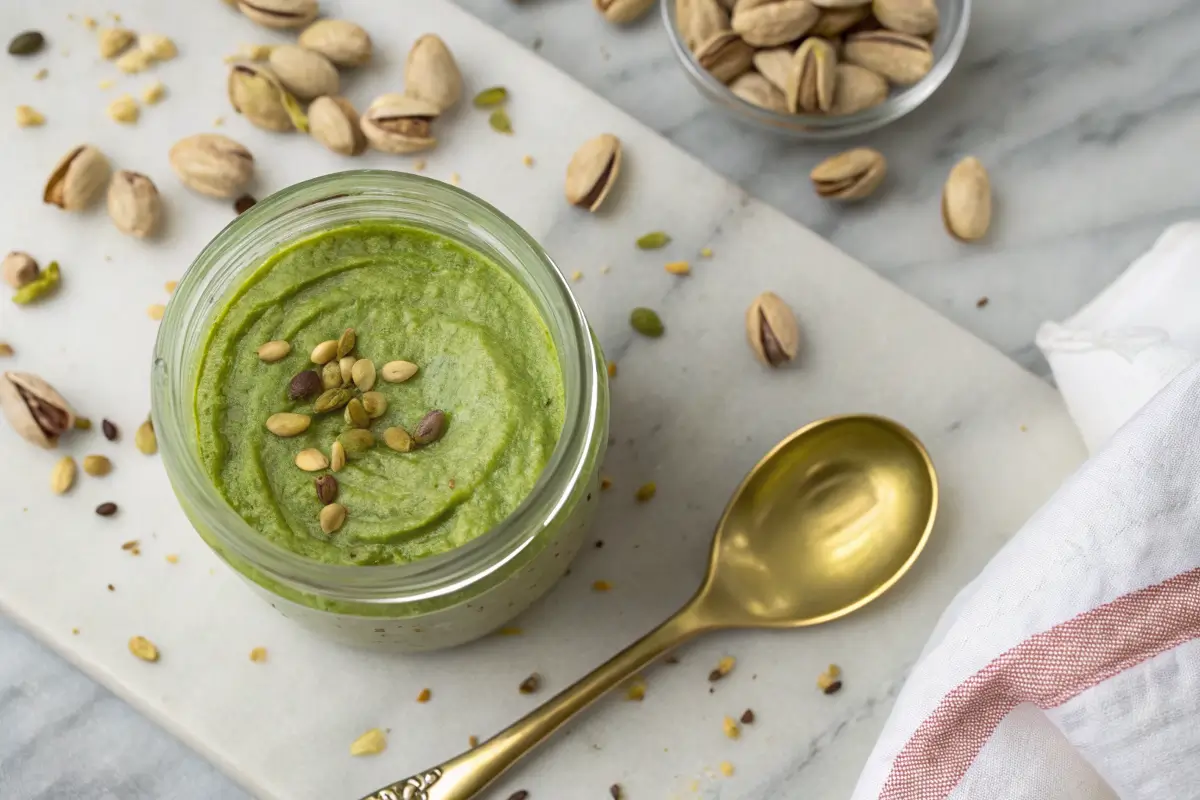
Pistachio Paste
Smooth, rich, and naturally green, this homemade pistachio paste bursts with nutty flavor. Perfect
for desserts, spreads, and baking!

- Total Time: PT25M
- Yield: 1 cup 1x
Ingredients
1 cup raw, shelled pistachios (unsalted)
3 cups water (for blanching)
1 cup ice water (for shocking)
1 tbsp neutral oil (e.g., grapeseed or sunflower)
1 tbsp powdered sugar (optional, for sweetness)
1/4 tsp almond extract (optional, for enhanced nutty aroma)
Instructions
Blanch the pistachios:
Boil 3 cups of water in a saucepan. Add pistachios and blanch for 1–2 minutes.Shock and peel:
Immediately transfer to a bowl of ice water. Once cooled, rub pistachios with a clean towel to remove skins.Dry the nuts:
Let peeled pistachios dry on a towel for 15–20 minutes to reduce moisture.Blend:
Add pistachios to a food processor. Pulse until finely ground.Add oil and optional ingredients:
Slowly add neutral oil. Continue blending until smooth and paste-like. Add powdered sugar or almond extract if desired.Store:
Transfer to an airtight jar. Refrigerate for up to 1 week or freeze for up to 1 month.
Notes
Use high-quality pistachios for best flavor and color.
Add a touch more oil for a silkier consistency.
The paste may thicken in the fridge—let it sit at room temperature before use.
- Prep Time: PT20M
- Cook Time: PT5M
- Category: Nut Butters & Spreads
- Method: Blending
- Cuisine: Middle Eastern
- Diet: Gluten Free
Nutrition
- Serving Size: 1 tablespoon
- Calories: 90
- Sugar: 1g
- Sodium: 0mg
- Fat: 8g
- Saturated Fat: 1g
- Unsaturated Fat: 6.5g
- Trans Fat: 0g
- Carbohydrates: 4g
- Fiber: 1g
- Protein: 2g
- Cholesterol: 0mg
Keywords: pistachio paste recipe, homemade nut butter, vegan pistachio spread, pistachio dessert base, how to make pistachio paste
Part 4: Flavor Variations & Usage Ideas

Flavor Customizations
Once you have your base paste, flavor it however you like:
Citrus twist: add ½ tsp orange zest for brightness.
Spiced: stir in a dash of cardamom or cinnamon.
Nut mash-up: blend half pistachios, half almonds or cashews.
Chocolate swirl: fold in melted dark chocolate after paste cools.
These variations turn a simple spread into something exotic and creative!
Usage Ideas
Here’s where pistachio paste really shines:
Filling for macarons: Pair with buttercream or ganache for that iconic green macaron.
Ice cream or gelato base: adds rich flavor and color.
Pistachio buttercream: mix into frosting for cakes/cupcakes.
Toast or bagel spread: drizzle with honey for a quick breakfast.
Pastry swirls: pipe into Danish, puff pastry, or croissants.
Also, it’s a great add-in for oatmeal, yogurt bowls, or smoothie packs.
For even more dessert inspiration, check out this pistachio layer cake recipe from King Arthur Baking, which beautifully highlights the nutty richness of pistachio paste.
Part 5: Storage, Shelf Life & Troubleshooting
Proper Storage
Once your pistachio paste is silky-smooth and full of flavor, it’s time to stash it right.
Refrigerator: Store in an airtight glass jar in the fridge for up to 3 weeks.
Freezer: For long-term use, spoon into silicone molds or freezer-safe jars and freeze for up to 3 months.
Always use clean utensils to avoid introducing moisture or bacteria, which shortens its life span.
Pro Tip: Add a layer of neutral oil on top to seal the surface and prevent oxidation. This keeps it tasting fresh and vibrant green.
Shelf Life Indicators
You’ll know your homemade pistachio paste has gone bad if:
The color turns dull gray or brown
It smells rancid or sour (oxidized oils)
The surface develops mold or fuzz
Remember: since it’s free of preservatives, natural pistachio paste is best used sooner than later.
Common Mistakes & Fixes
❌ Paste Is Too Thick
Add 1–2 tsp of oil gradually while blending until you reach the right consistency.
❌ Tastes Bitter
You likely didn’t blanch and peel the nuts well. Try mixing in a little honey or maple syrup to mellow it out.
❌ Clumpy or Gritty Texture
Blend longer, or use a more powerful food processor. You can also warm the pistachios slightly before blending to encourage oil release.
❌ Dull Color
Use raw, vibrant green pistachios, and be sure to remove skins completely. You may also add a small pinch of spirulina or matcha for natural color enhancement.
These are easy fixes for a smooth, flavorful result.
Part 6: Nutritional Info & Dietary Benefits
Pistachio Paste Nutrition Facts
A tablespoon of pure pistachio paste (without added sugar or oil) typically contains:
Calories: 90–100
Protein: 3g
Fat: 8g (mostly unsaturated)
Carbohydrates: 4g
Fiber: 1g
Natural sugars: ~1g
Vitamin B6, magnesium, and potassium
It’s nutrient-rich, heart-healthy, and offers a great plant-based protein source.
According to the Cleveland Clinic, pistachios may help lower cholesterol and improve gut health.
Who Should Eat It?
This delicious nut spread is ideal for:
Vegetarians and vegans
Athletes looking for energy-packed spreads
Kids (with no nut allergies) as a natural alternative to sugary spreads
Low-carb/keto eaters in small portions
Avoid if you have nut allergies, obviously. Always consult your healthcare provider if unsure.
Part 7: FAQ Section — People Also Ask
Based on Google’s “People Also Ask”, here are top queries:
What is pistachio paste made of?
Pistachio paste is made from shelled pistachios ground into a smooth consistency, often blended with oil, sugar, and sometimes vanilla or almond extract. It can be raw or roasted, depending on flavor preferences.
Is pistachio paste the same as pistachio butter?
Nope! Though similar, pistachio butter is usually thinner, meant for spreading like peanut butter, and often sweetened. Pistachio paste is thicker, more concentrated, and used in pastries, ice cream, and baking.
Can I use pistachio paste in savory dishes?
Absolutely! Use it in:
Pistachio pesto
Salad dressings
Dips with yogurt or tahini
Stirred into couscous or quinoa for a nutty twist
It’s a flavor powerhouse that goes way beyond dessert.
Can I make pistachio paste without a food processor?
Yes, though harder. Use a high-speed blender or a mortar and pestle (for a traditional texture). It takes longer, but still works.### Where can I buy pistachio paste if I don’t want to make it?
You can find it online on Amazon or specialty baking stores like Valrhona, Sicilian Pantry, or La Tourangelle. But making it at home means better freshness and flavor—plus it’s more cost-effective.
Part 8: Conclusion & SEO Summary
Final Thoughts on Homemade Pistachio Paste
Creating your own homemade pistachio paste isn’t just about flavor—it’s about creativity, nutrition, and control. Whether you’re slathering it on toast, filling pastries, or folding it into creamy gelato, this emerald-green spread transforms everyday dishes into gourmet delights.
And once you get the hang of it, the variations are endless. You can go bold with citrus, warm with spices, or indulgent with chocolate. There’s really no “wrong” way to enjoy it.
Key Takeaways
Use high-quality raw pistachios, preferably skinned
Control sweetness, consistency, and flavor with simple ingredients
Store safely to preserve freshness
Add to sweet and savory recipes alike
This paste isn’t just an ingredient—it’s a culinary upgrade.

ymmyy
★★★★★